This article uses two domains rohandroid.com ( old website domain ) and rohutech.com ( new website domain ). Using these two domains as an example will help you understand the WordPress Migration process very effortlessly in 10 Simple steps.
Remember to replace rohandroid.com with your old site domain name and rohutech.com with your new site domain name.
Note: The server which I am using is having CentOS installed.
Page Contents
10 Simple Steps for WordPress Migration to a New Domain :
1. Create rohutech folder
sudo mkdir rohutech
2. Add index.php in the folder
Create an index.php file in the folder with some simple content like “Hello, this is rohutech”
sudo vim index.php
Some Important Links –
- http://httpd.apache.org/docs/2.0/mod/core.html#serveralias
- https://stackoverflow.com/questions/18362166/what-is-the-difference-between-servername-and-serveralias-in-apache2-configuration
- https://serverfault.com/questions/417810/difference-between-servername-and-serveralias
3. Add Virtual Host entry
<VirtualHost *:80>
    ServerName rohutech.com
    Serveralias www.rohutech.com
    DocumentRoot "/var/www/html/rohutech"
    Redirect permanent / http://rohutech.com
</VirtualHost>

<VirtualHost *:443>
    ServerName rohutech.com
    Serveralias www.rohutech.com
    DocumentRoot "/var/www/html/rohutech"
    SetEnv APPLICATION_ENV "production"
    SSLEngine on
    SSLCertificateFile "/etc/pki/tls/certs/www_rohutech_com/www_rohutech_com.crt"
    SSLCertificateKeyFile "/etc/ssl/private/www_rohutech_com.key"
    SSLCertificateChainFile "/etc/pki/tls/certs/www_rohutech_com/www_rohutech_com.ca-bundle"
    <Directory "/var/www/html/rohutech">
        DirectoryIndex index.php
        AllowOverride All
        Order allow,deny
        Allow from all
    </Directory>
</VirtualHost>
Just wanted to point out that the above virtual host entry is as per apache 2.2. If you are using apache version 2.4 which is the latest version as of Oct 2019, refer this link
http://httpd.apache.org/docs/current/upgrading.html
4. Restart Apache
sudo systemctl status httpd.
Now visit http://rohutech.com
You much see "Hello, this is rohutech" (as we added index.php in 2nd step) on the web Page.
5. Copy content from the old website to the new website.
sudo cp -av rohandroid/. rohutech/
6. Take MySQL Dump.
mysqldump -u demouser -p demodbname > /tmp/rohandroid-live-24042019.sql
7. Create Database.
Login
     mysql -u root -p
 create database
     CREATE USER 'myuser'@'localhost' IDENTIFIED BY 'mypassword';
     CREATE DATABASE mydbname;
     GRANT ALL PRIVILEGES ON mydbname.* TO "myuser"@"localhost";
     FLUSH PRIVILEGES;
     exit
8. Import Database
mysql -u myuser -p mydbname < /tmp/rohandroid-live-24042019.sql
when prompted for password enter password
mypassword
9. Restart Apache Server
sudo systemctl status httpd
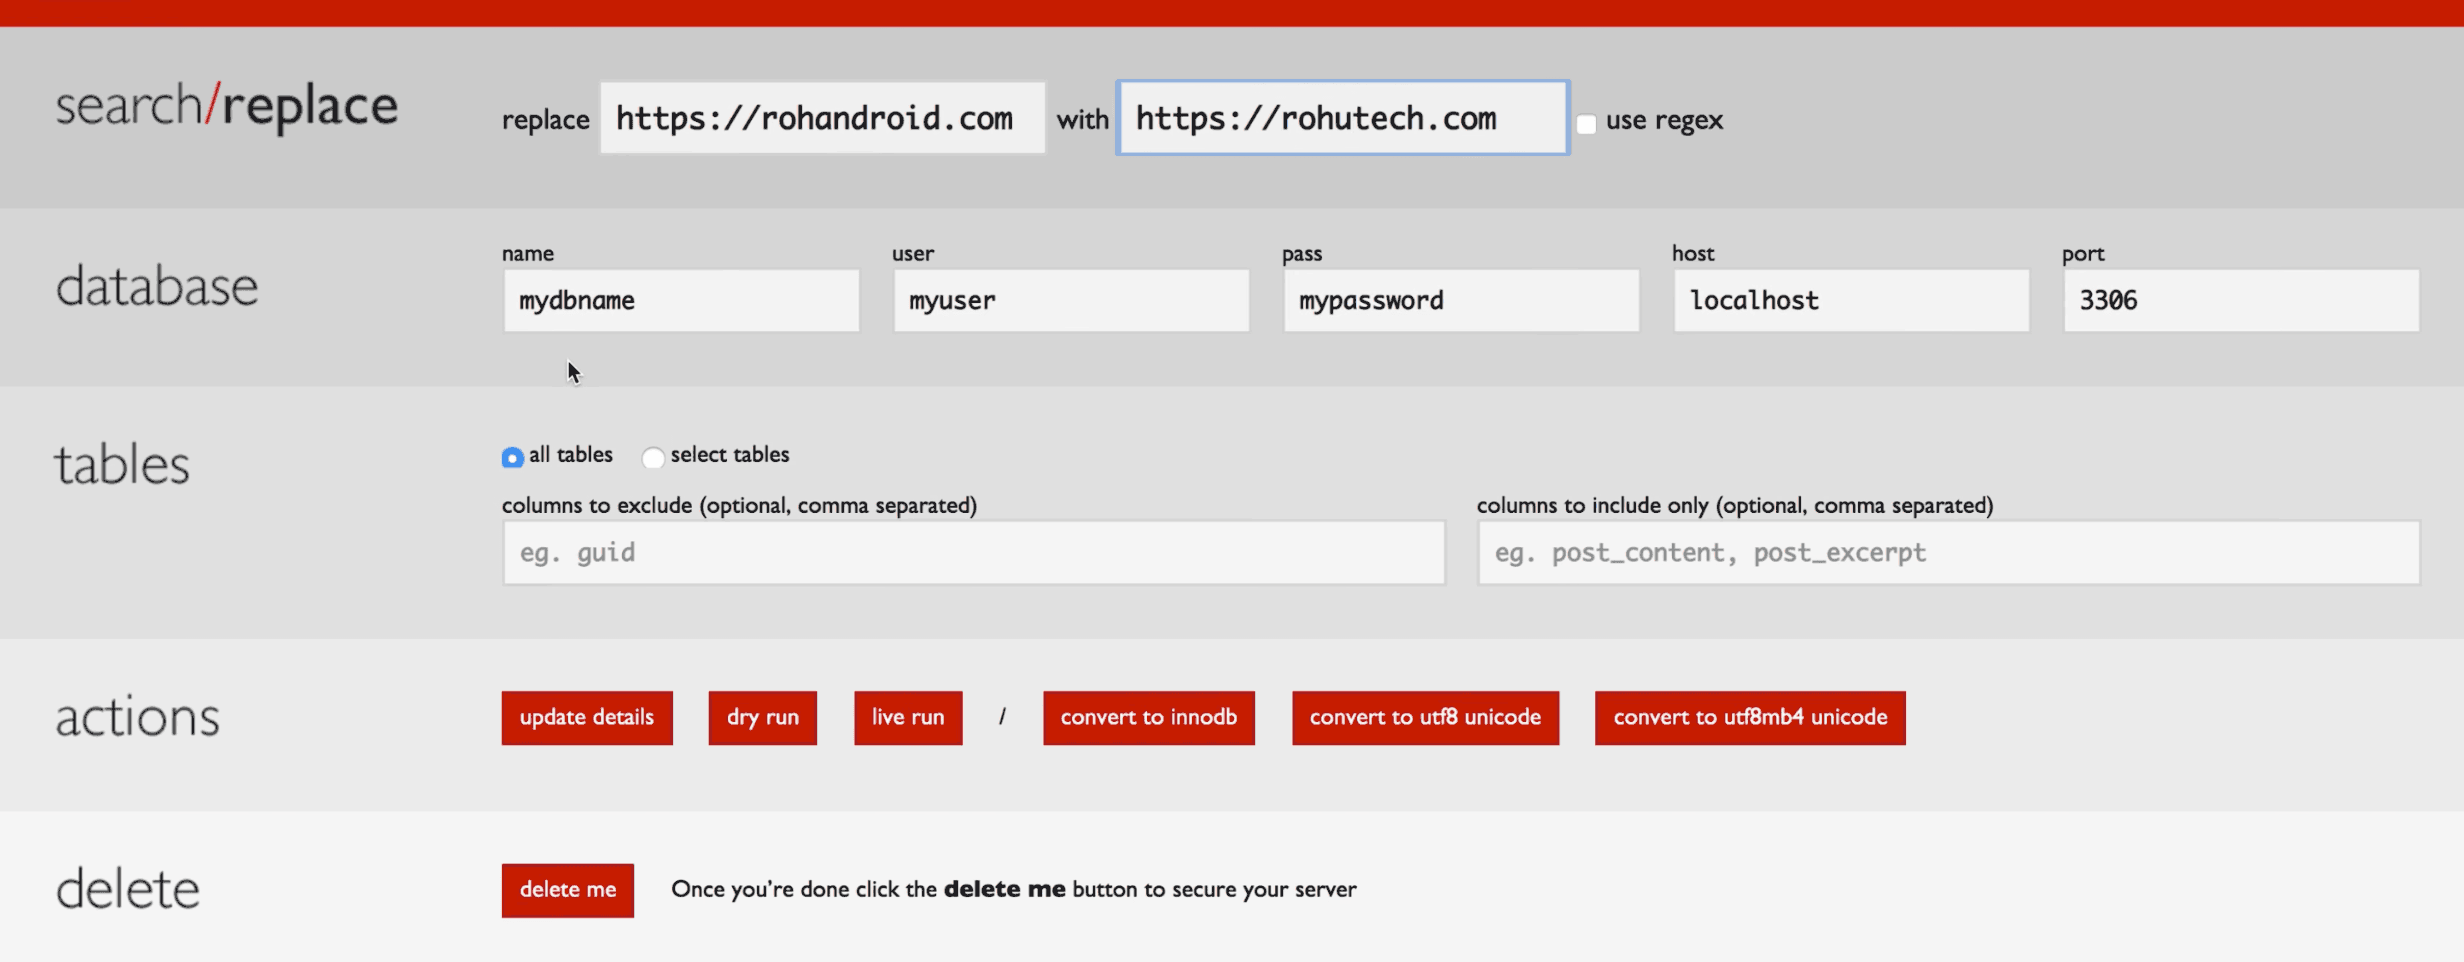
10. Search & Replace URLs
This step can be done in two different ways
Copy Paste “Search replace script” at the root folder of the new website. Using this script you can just replace all the old website URLs with new website URLs

wp search-replace 'https://rohandroid.com' 'http://rohutech.com' --dry-run --precise

wp search-replace 'https://rohandroid.com' 'http://rohutech.com' --dry-run --precise nahro_posts --report-changed-only
Very Important commands to consider for file and folder permission, Just run below commands inside your Website folder.
sudo find . -exec chown ec2-user:apache {} +
sudo find . -type f -exec chmod 664 {} +
sudo find . -type d -exec chmod 775 {} +
sudo chmod 660 wp-config.php
Don’t forget to subscribe to my Youtube Channel – RohuTech
Thank you so much for reading, hope you guys liked the article and the video tutorial. Would love to know your feedback in the comments.
If this article helped you in some way kindly comment down below, I will be very much happy to know that my articles are actually helping people.
Sharing is caring. Don’t forget to share this post!


